This blog may contain affiliate links, as an affiliate marketer and as an Amazon Associate I earn from qualifying purchases.
💎 How To Make a Working QR Code 💎
Full Tutorial 🔹️ Instructions Listed With Pictures
This was by far the hardest project I’ve done!
Typically I don’t stress too much about mixing up a drill color, as it’s art, but for the QR Code to be functional it has to be a perfect replica. Another stressor, I wanted perfect squares, but square drills (at least these) are not perfect squares. This is why canvases have a drop of space between them! My rows are not perfect, they wobble slightly and are not perfectly spaced!
🥰 It works though 🤗 and I’m very excited! 🥰
➡️ All supplies needed:
✅️ 4.5 x 4.5 in. Wood Squares
✅️ Black (310) Square Drills (1000 Recommended)
✅️ White (5200) Square Drills (1000 Recommended)
✅️ Apple Barrel Paint
✅️ Paint Brushes
✅️ Rulers and/or Straight Edge
✅️ Printer
✅️ Printer Paper
✅️ Pens and Pencils
✅️ 110lb Card Stock
✅️ Crafter’s Square Roller Cutter
✅️ Crafters Square Cutting Pads, 9×7 in.
✅️ Always Stay Humble and Kind Printed Placemat (to protect surface from paint and adhesive)
✅️ Dotz Stick
✅️ Drill Pen – Includes Straightner
✅ Double-sided Release Papers
✅️ Translucent Plastic Storage Boxes with Clip-Lock Lids, 8.75×6.125×2.75 in. (the container I used to dry my project in)
✅️ Binder Clips
✅️ Colorful Clips
✅️ Micro Glue Dots
✅️ Oversized Trays with Lids
(and then please join my FB group)
Start by printing the QR code you’re using as a pattern on regular paper.

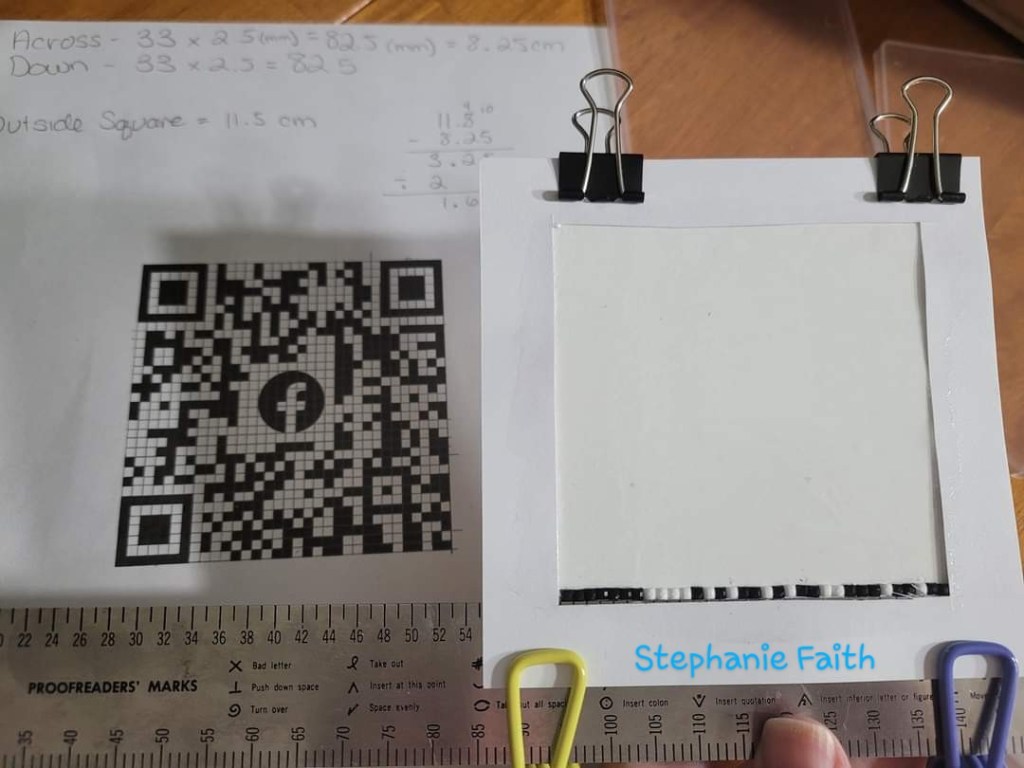
Measurements:
33 Squares across x 2.5 mm per suqare = 8.25 cm
Outside square = 11.5 cm
11.5 – 8.25 = 3.25 ÷ 2 = 1.625 = the boarder for my frame drawn and cut from cardstock
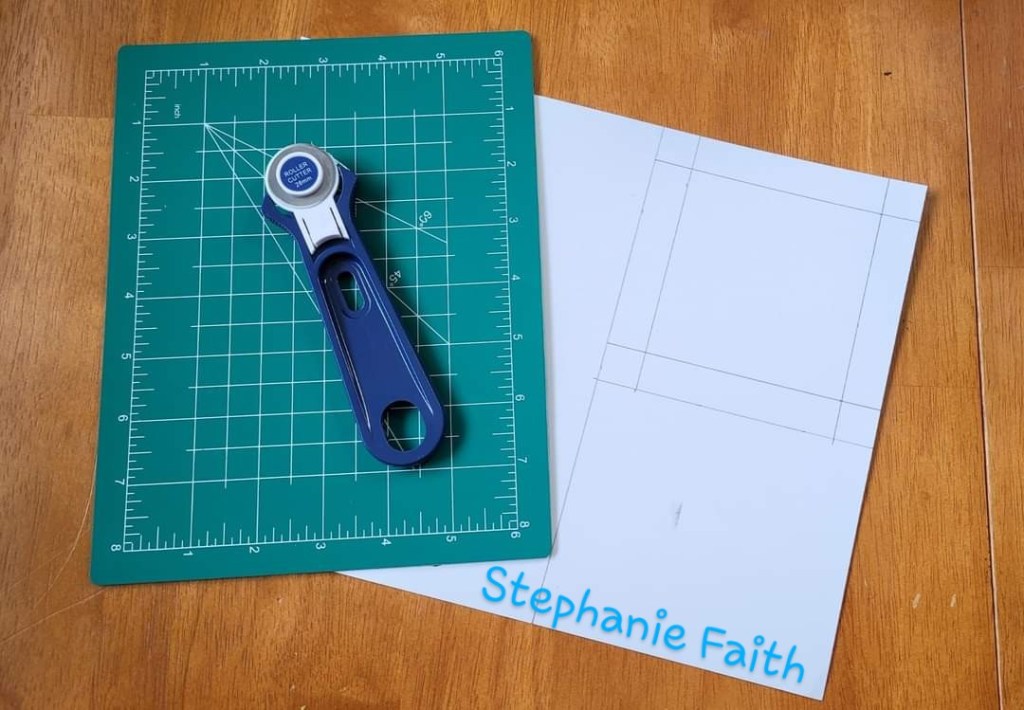
Using the rotary cutter on the self healing mat and straight edge to cut out my template

My template did NOT come out perfect and thats OK it still works just fine 🥰

Wood Squares

Checking my template on my square before starting the project.

Drawing lines across the QR Code to be able to more easily count squares while I’m working.
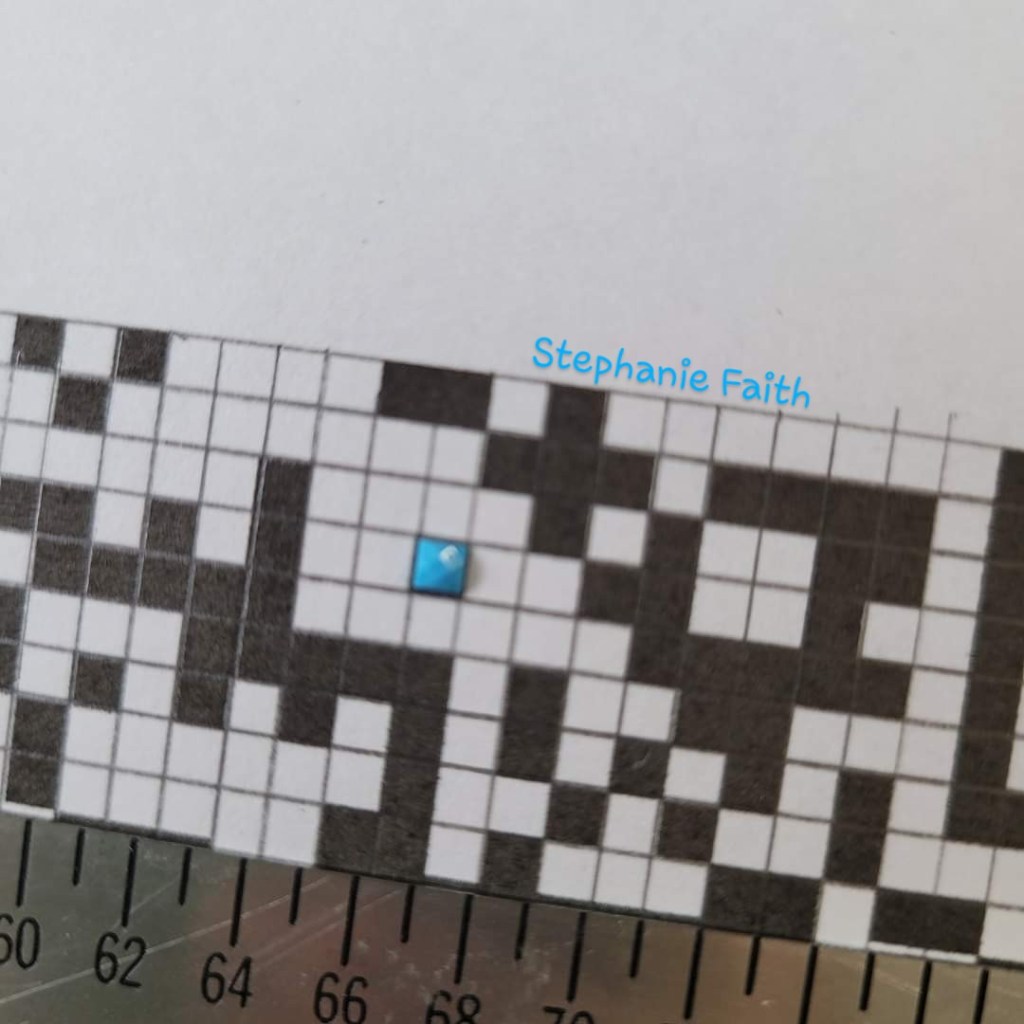
As you can see, the drills are a touch smaller than my printed QR Code. Since I’m just using the printed one as a guide, it doesn’t matter!

Finished drawing my grid.
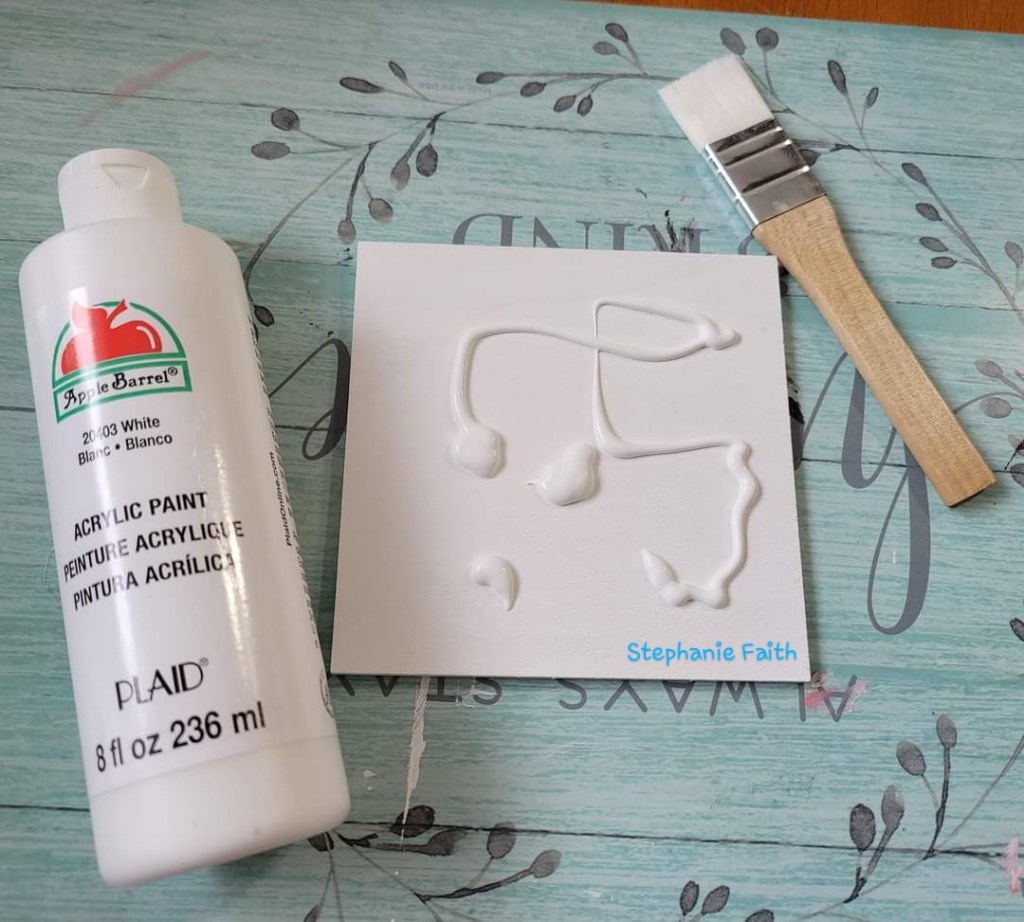
Painted one coat, let dry overnight and then painted a second coat.

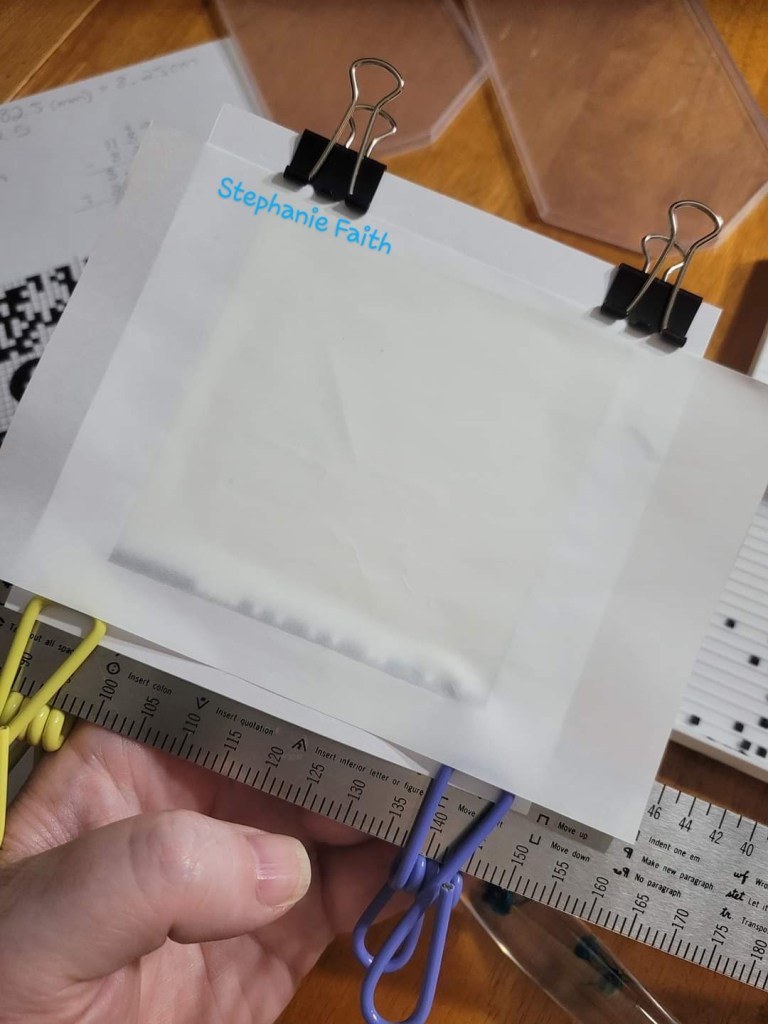
Once the paint was completely dry, at least 24 hours later, I held the template in place with binder clips and painted the Dotz Stick on.
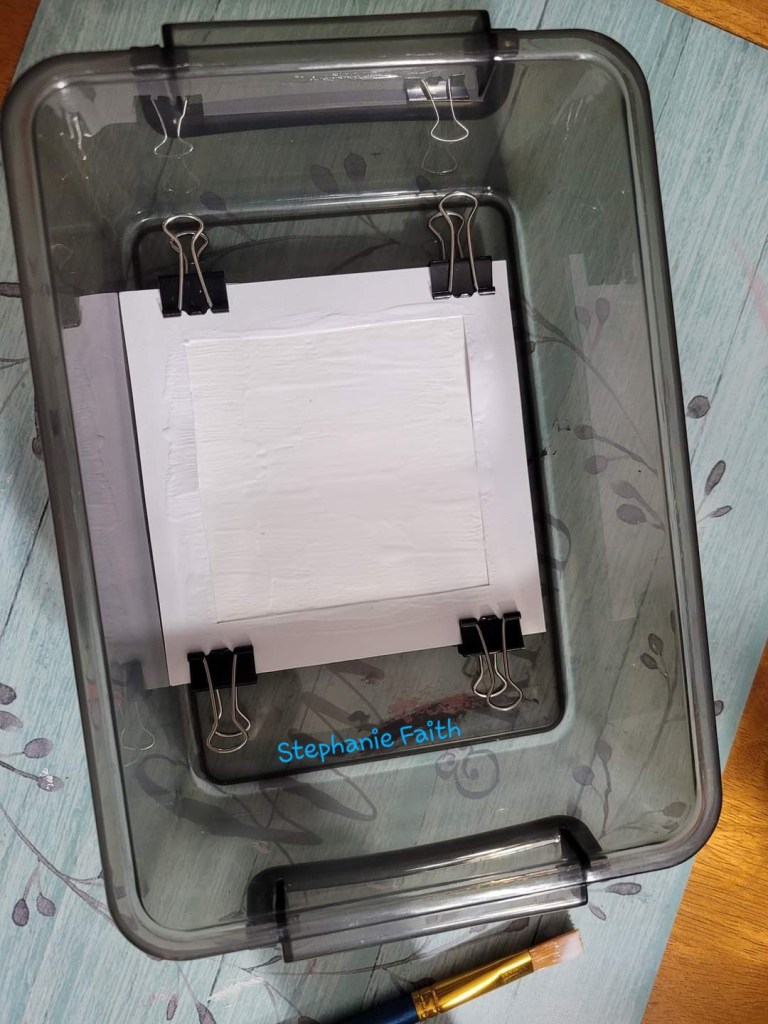
The Dotz Stick also needs to dry completely and be uncovered, but I have cats and children, so I set it in a container to keep dust and fur off of it while it dries.

Covered and drying.
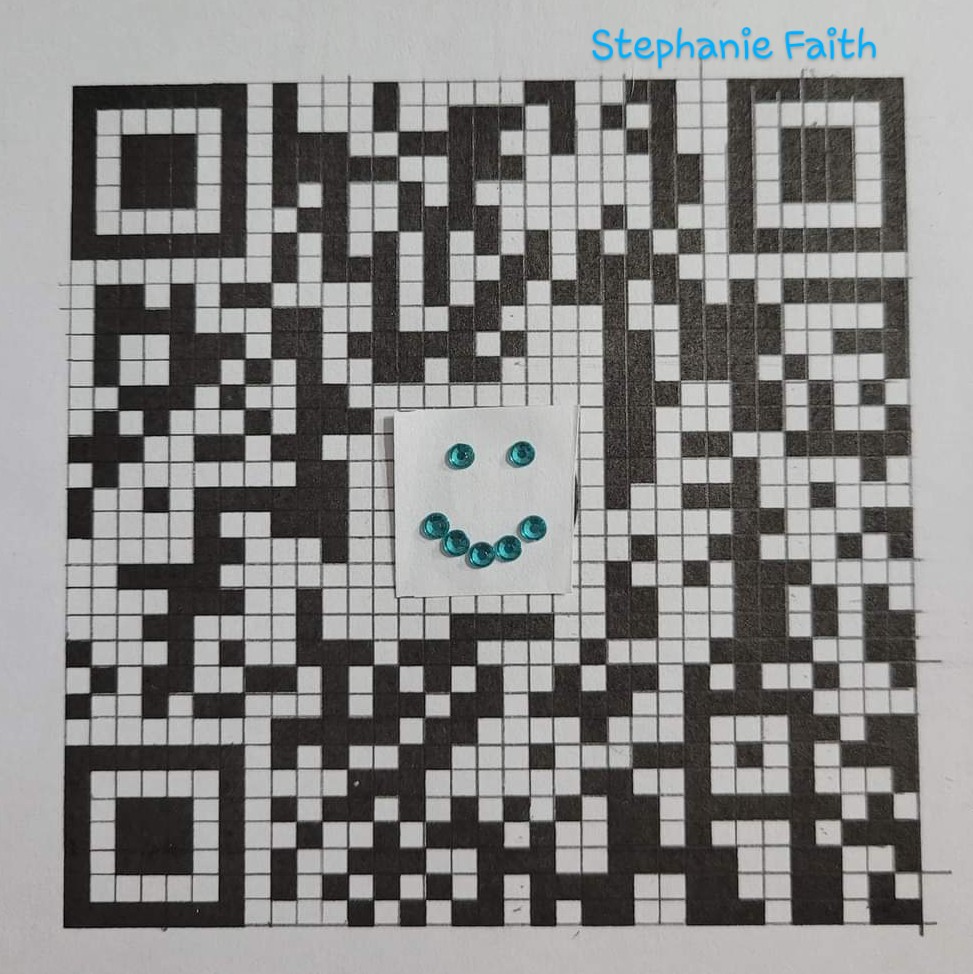
Checking to make sure my QR Code will still work, no matter what I put in the center.
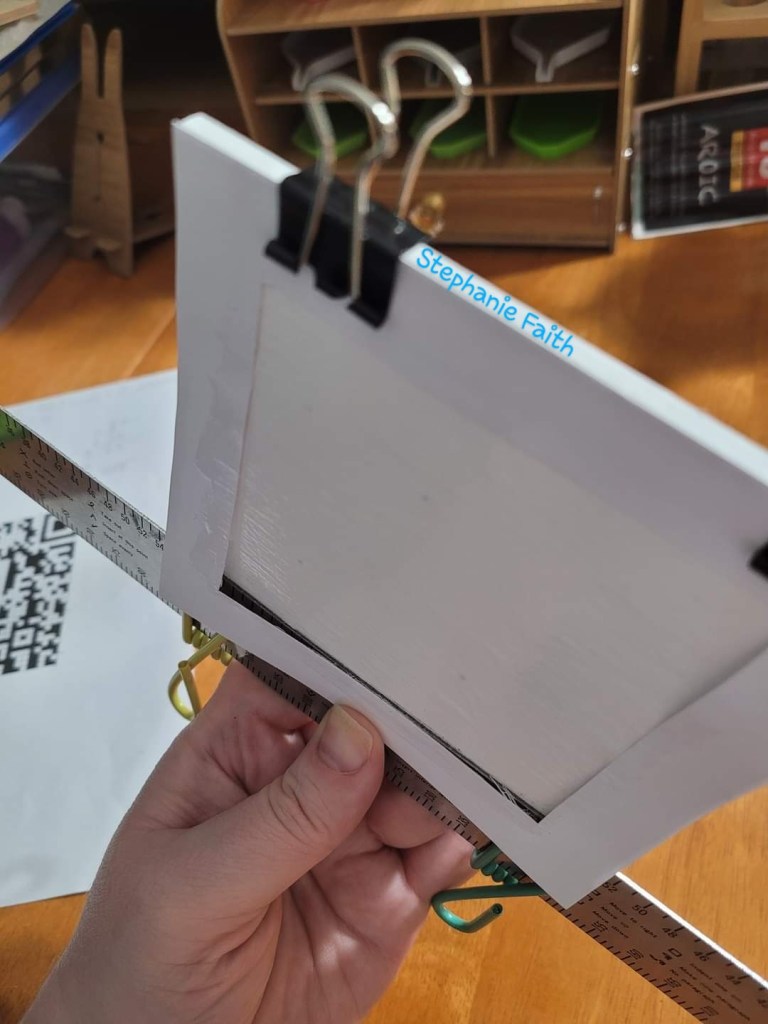
Once dry, I clipped my straight edge to the bottom to reinforce a straight line as my template wasn’t perfect.

Another view of the straight edge under my template.

The first line. By far the hardest part of this project. 😅
Looks good though.
Cover with release paper in between dotting sessions.
Cleaned up between sessions.

Glue Dots instead of pink wax.

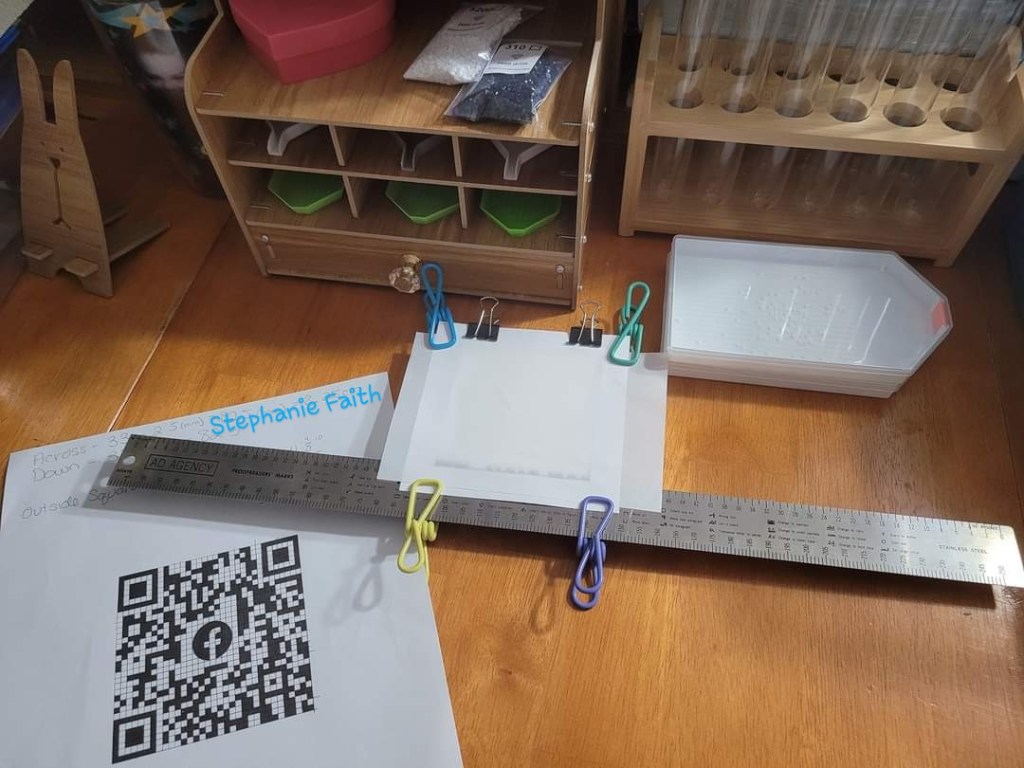
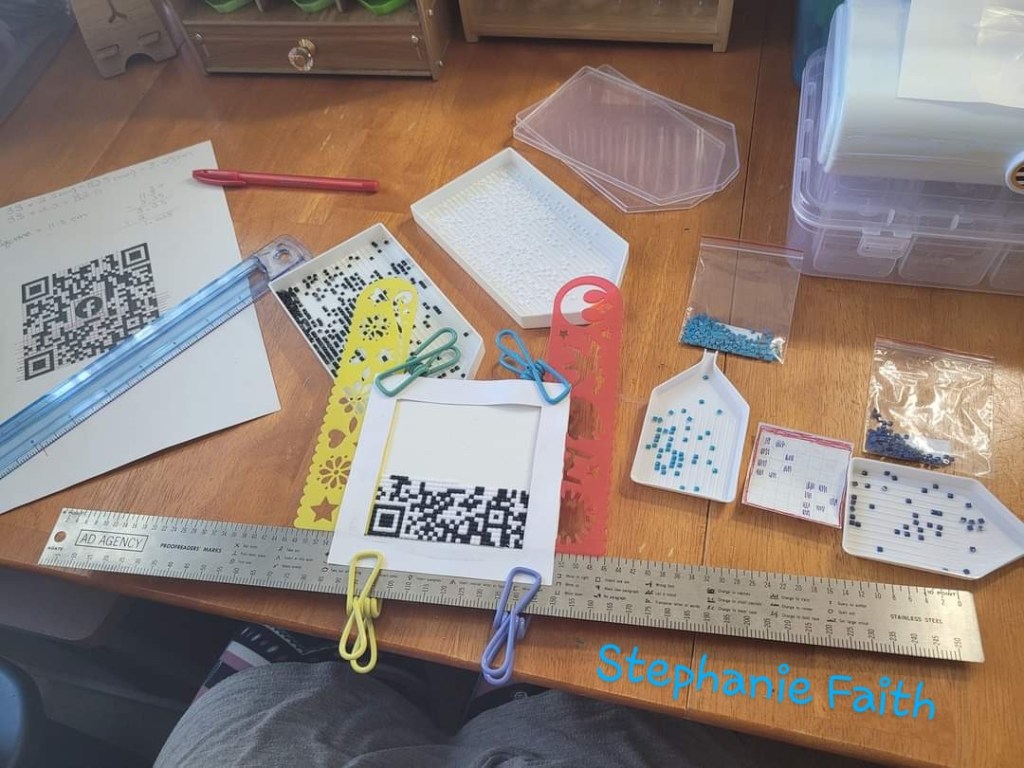
Progress- I added rulers to the sides to keep my drills straighter. Still under the template I made.

Choices for the center of the QR Code.
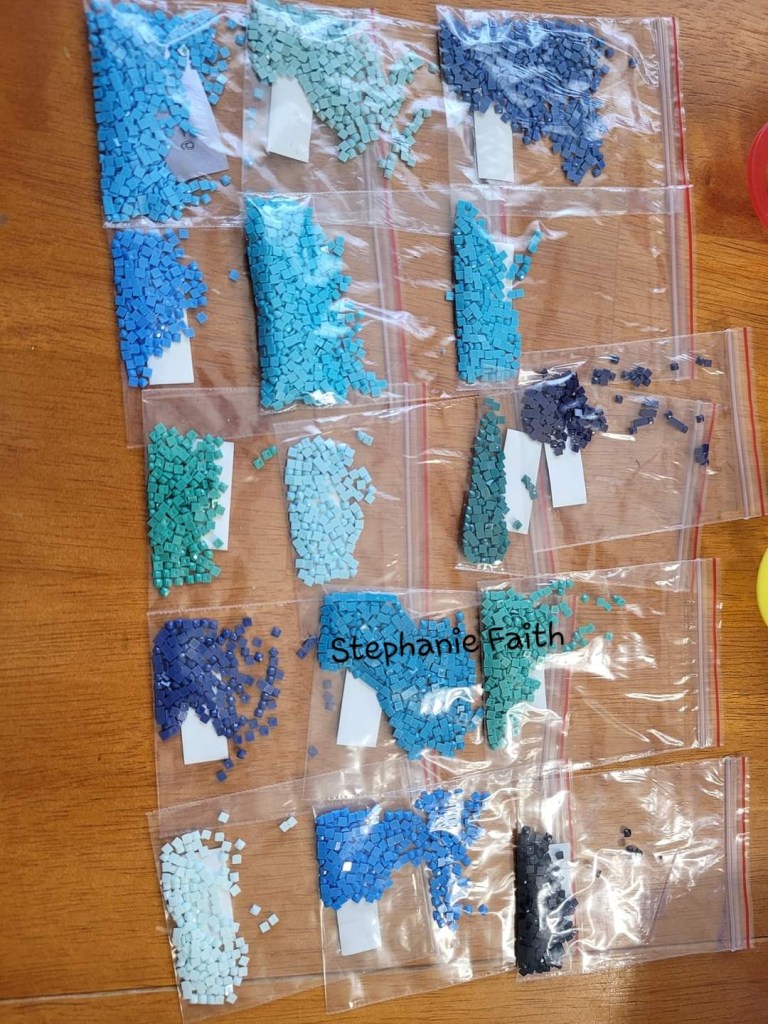
Color options left over from a square diamond painting.
The design and colors I choose.
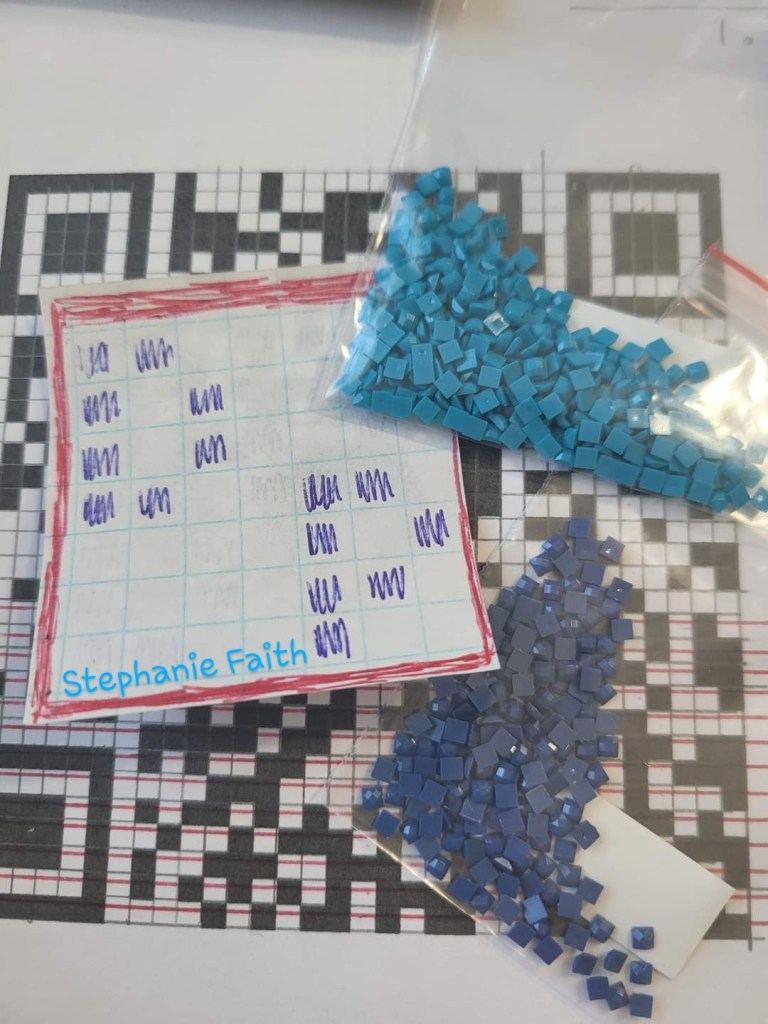
Counting squares got even harder while following two different patterns, luckily it was only a small area I needed to do this for.
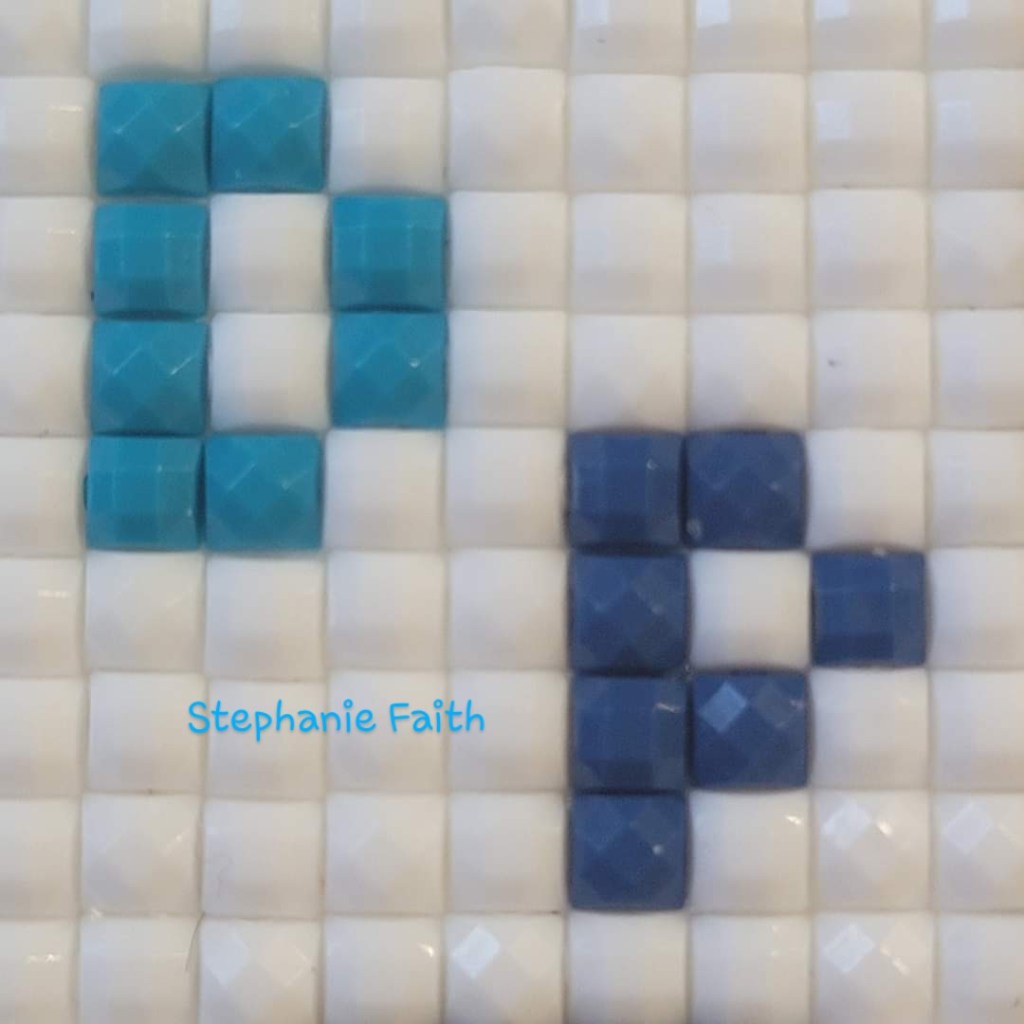
The center finished.
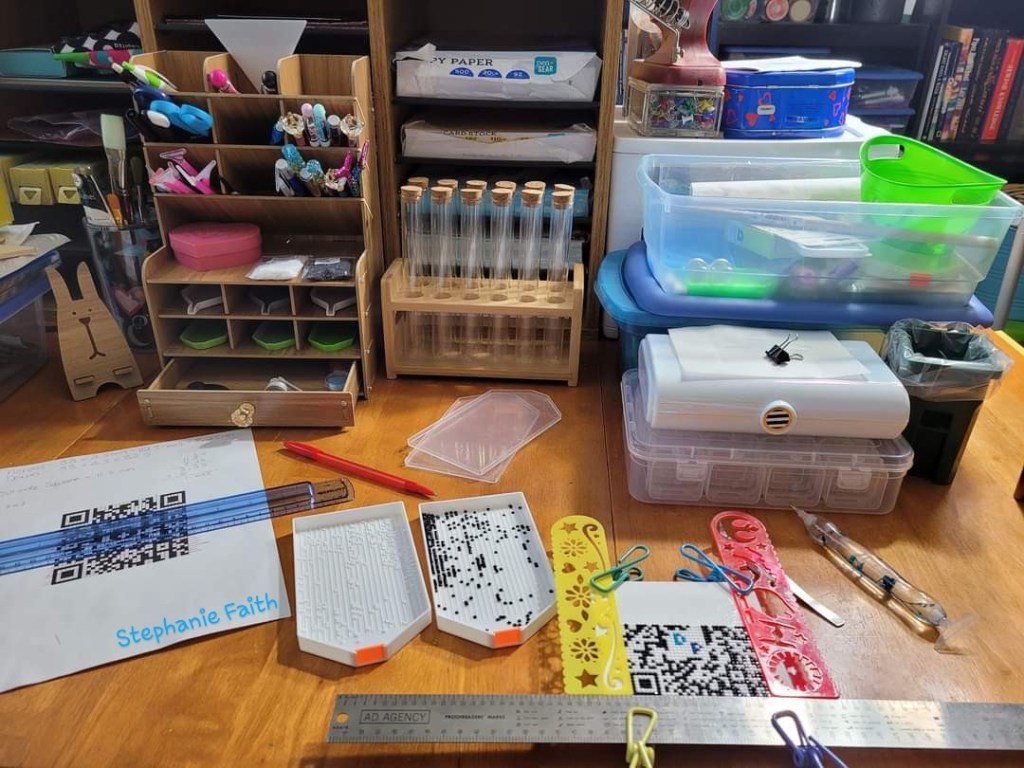
My whole setup.

Almost done. 🤗
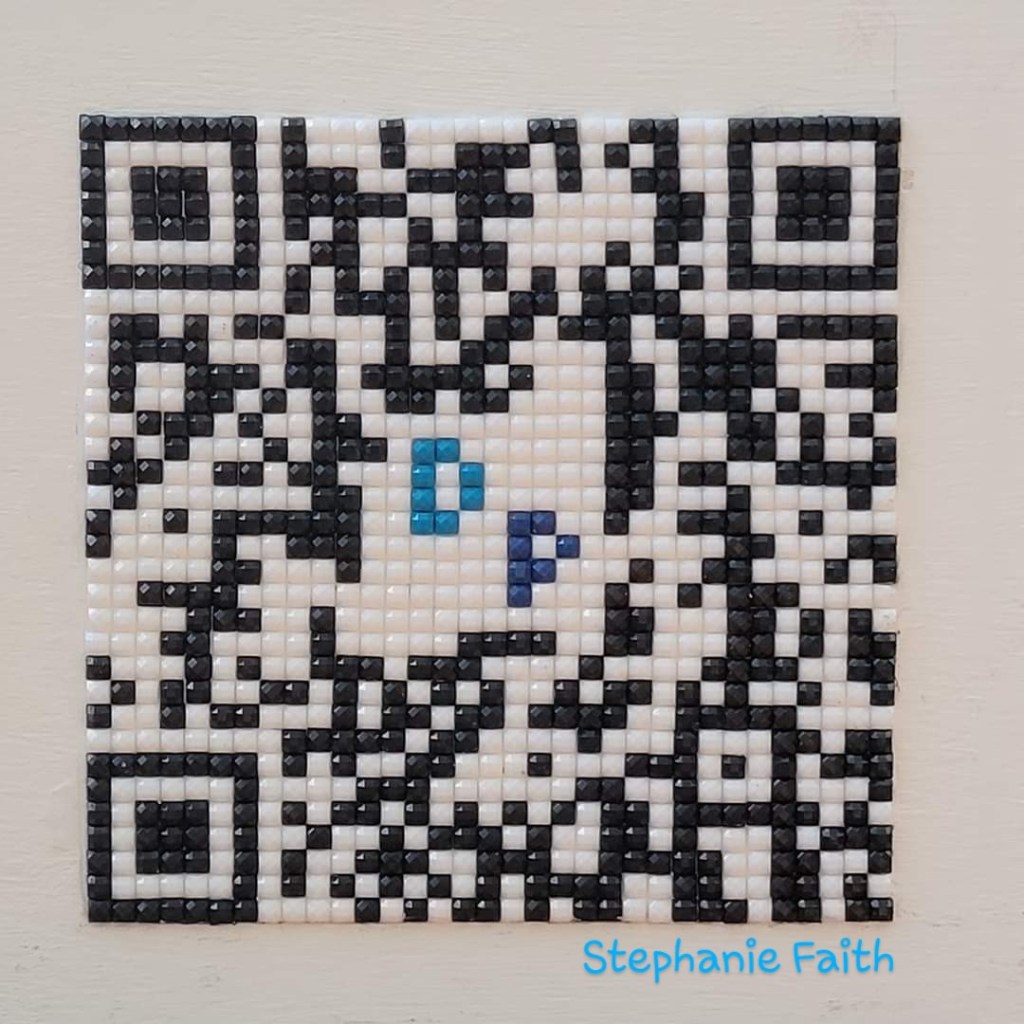
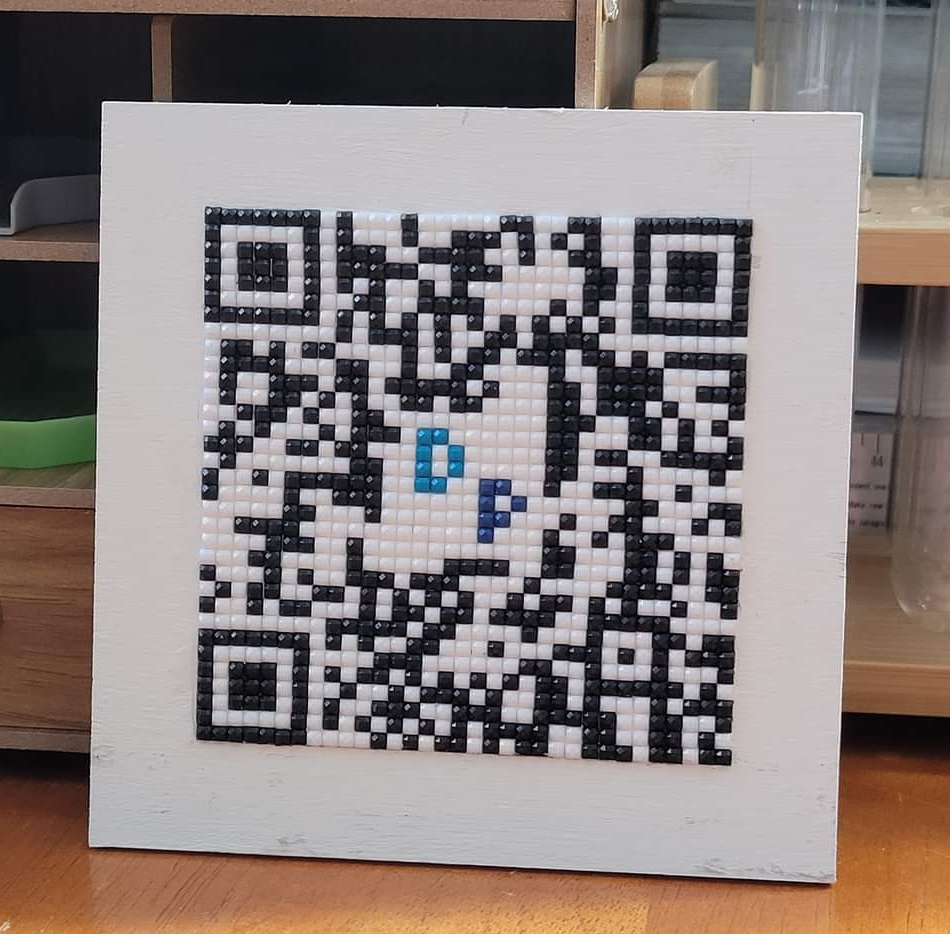
The finished product! Scan it- it really works! 🎉
How to scan the finished QR Code

I opened the saved picture in my gallery folder and chose the lens option. This will be different on different phones.

The results when I click the lens button above.

