
This blog may contain affiliate links, as an affiliate marketer and as an Amazon Associate I earn from qualifying purchases.
I have been in the Amazon Affiliate and Influencer programs for several years now and I receive a lot of product samples from different sources, to create content with. This comes with a serious need to stay organized. I haven’t found a great way to do this digitally, and trying to arrange physical products in some sort of single location proved impossible, so I created my own system to keep track of all my samples and what part of the production process each product was in.
Yes, it’s a little old school, I am an 80’s baby, so while pen and paper may seem outdated, I actually enjoy the small part of my workflow this has become.
Download my printable PDF HERE
Please, please, please encourage others to purchase a PDF themselves. I have kept the price low, it’s a single download and you can print as many copies as you desire, forever ! Plus I have shared all this other info on here for FREE with you. While sharing is caring, I poured hour upon hour of myself into creating this system, so I very, very strongly encourage you not to simply share the downloaded file, once downloaded.
Before using the cards
You will need to create yourself a few private wishlists on your Amazon account.
Mine are:
- CC – Interests
- Samples OTW
- ASAP Videos
- ASAP Photos
- Videos I’ve Made
- Photos I’ve Made
While browsing Creator Connections I add all possible collaboration interests to my “CC – Interests” wishlist.
When ready to request samples, I go through the wishlist, copy the ASIN or brand name and head back to Creator Connections to read the campaign briefs and then do my product research.
After all that is when I reach out the to brand. I change my pitch regularly, but the basic thing that I find, that keeps everyone the happiest, is to share a clear plan on what I plan to do with the product and where I will share that content. I share with the brands what I believe will make my content stand out from all the other influencers who are also asking for samples on Creator Connections.
Printing the Cards
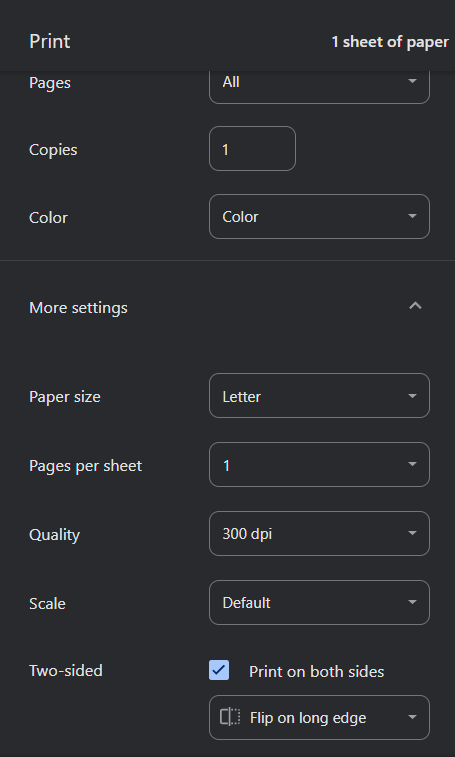
Printing should be pretty straightforward. It’s a 2 page PDF that you simply want to print double-sided and “flip on long edge”. This will give you 4 copies of each Production Workflow card on each piece of paper. You then just need to cut the paper into quarters and you’ll have 4 cards printed on both front and back. HERE is an affiliate link to a laminator with a built-in paper cutter I received as a sample from Creator Connections in exchange for sharing this link in this blog post. While I print in color, these work just fine if you print in black and white as well.
Over-explaining the Basics
I initially made these for myself, and I think everything is self-explanatory, but I will go over exactly how I use these cards anyway. I apologize in advance for any redundancy, I’m trying to answer all the questions I think you may have.
Every product gets it’s own card! I used to combine up to 3 products (from a single brand) per card, but I find this makes it harder when a campaign is extended for one product and not the other(s) and sometimes I will use one of the products for different content than the other(s) so I have learned for myself, it’s just easier to make each product it’s own card.
The little stars are instead of a checkmark, since every product will have an individual agreement with the brand. I color in the corresponding stars if that is a task I need to complete for that specific product.
No, I don’t upload to every country listed, I just included them all while designing the cards. I just ignore all irrelevant parts of a card.
Front of the Card
When I hear back from a brand and they ask for my shipping info or I have made a final agreement of the production content, this is when I create a card. I immediately fill out as much as I can.
The first line, PRODUCT, I use this as my working title, I don’t copy the Amazon listing, it’s always something simple, that I would actually call the product in real life.
I do copy the brand name and ASIN from the listing. This is actually the trickiest part of writing this info by hand, lol, I am just cautions to double check what I am writing.
I write the date of the actual agreement, and obviously skip the “date product received” until it actually shows up, That’s when I fill that in.
Since the prices fluctuate so often, I choose to track the date I agreed to the content as what I use for tax purposes. I am going to recommend consulting with your own tax professional and tracking the price on the day they suggest, if it is different.
Next, where is this product coming from and what are the dates and and payments?
If you are not familiar with Logie, I will link a blog post here soon. In the meantime, feel free to check out their website HERE and don’t forget to use my “Invitation Code” TGOT if you choose to sign up with them.
If I find the product on Creator Connects I will often skip circling the “no” for Logie, I will go back and circle “yes” if I notice the product has commissions offered from both Logie and Creator Connections.
I actually just ignore whatever isn’t relevant, rather than circling no for any section.
As for working with paid agents, they have always found me. Just produce good content, link your socials to your Amazon storefront and make yourself easy to find on the internet.
Under “Amount” I typically leave it blank, but occasionally I will buy products for content creation purposes, so if I do, I keep track here. If you want, you could always write “FS” (free sample) or “sample” in this space as well.
If I have any names, websites, social links or email addresses available, I add those to the “Contact Info”. For most Creator Connections and Logie products, I leave this blank.
If I am doing a multi-product video or photo, I tend to name that piece of content for myself and write that under the notes. I also use this space for any other information I deem important. Do I love the brand? Do I not like the brand? Are they difficult or easy to get along with? Do I want to work with them again or not want to ever work with them again? Did they send what I requested, or did they send a random product? Did they request I use specific #’s in the post? I make all relevant notes on anything else that I want to remember about this product.
Back of the Card
On the back of the cards is the actually process I go through for each product once it has arrived.
I have already colored the stars when making the agreement with the brand, so now I just go through from top to bottom and check off the boxes for each starred task as I complete it.
I used to wait until I had the product in hand to accept the Creator Connection campaign. It doesn’t much matter anymore.
I like to let the brand know that the product arrived and this is when I do a quick check to make sure there is no damage or if there was an issue with shipping.
Now the product goes through the actual “production process” as I add to various places and record and edit each piece of content.
The wishlists I reference are those private wishlists I recommended creating at the beginning of this post. This helps me find the products again on Amazon if I need to for any reason. The ASIN I have written down is also very helpful, but I can find most products by keyword searches in the wishlists, without having to look up the ASIN.
Logie will automatically connect any content uploaded directly to Amazon, but if you are sharing on socials it’s a good idea to add those social product links to Logie.
One of my biggest pet peeves is when content creators don’t properly use disclosures. Please review the FTC Disclosures HERE and read through the .gov results. These are more than rules set forth by Amazon, this is actually United States law. If you are receiving products for free, for content creation, it needs to be clear to the viewer of your media. I made myself a note on these cards to remember to include this info when I created the cards because it is such an important component of the creation process. For videos, the disclosure needs to be both verbal (as long as you are speaking in the video) and presented on screen, both near the beginning of the video. I cringe so hard at the amount of videos I see on Amazon that don’t follow proper protocol on this.
Organizing the Cards
Now we are at my favorite part of using these paper cards.
Yeah, it’s nice that I have all info organized and easy to access when it comes time for taxes, but that is not my favorite part. Here is what I can’t do with a spreadsheet, and why I prefer these cards.
I have some divider cards, right now I will list them out for you, in the future I will make them available for download. The most simple way to create a set of divider cards is to take construction paper (because it is colorful and slightly larger than printer paper) but even a few blank sheets of printer paper will work, and cut it into 4 equal sections, just like the production cards.
These will be titled:
- Waiting For Arrival
- Need To Photograph
- Need To Record
- Need To Edit
- Need To Upload
- Waiting For Payment
- Completed
- Blank Cards
Now I can take the physical cards and group them however I would like. I tend to paper clip cards together if I plan on using several products in one piece of content.
I also tend to move cards along the production process several steps at a time. I may photograph a product, record and edit the content all at once, and then check my card for any uploading notes, and upload, skipping the necessity of physically moving the card from one section to the next. But this way of organizing the cards is super helpful when I don’t finish each step in the process.

Dollar Tree sells both the taller index card container and the more flat container that fit these cards perfectly. Both include necessary lids. I started using these in 2024, and I started a new box in 2025 to help further organize what content was completed in which calendar year.
That’s everything I think you’ll need to know to get the most use out of these.
As a reminder, HERE is the link to purchase a PDF file containing the cards. If you find this blog article so helpful that you want to contribute finically to my ongoing efforts – I have a tip jar on my Linktree HERE or you can use the form below to contribute through Stripe – you will need a WordPress account to donate below. If you have any questions, please submit them to my email through the form below. While I may not be able to respond to every inquiry individually, I will read them all and use feedback to edit this blog post if necessary.


Make a one-time donation
Make a monthly donation
Make a yearly donation
Choose an amount
Or enter a custom amount
Your contribution is very appreciated !
Your contribution is appreciated.
Your contribution is appreciated.
DonateDonate monthlyDonate yearly
